Trong thế giới phát triển ứng dụng hiện đại, việc xây dựng một backend hoàn chỉnh thường đòi hỏi rất nhiều thời gian và công sức. Từ việc cấu hình cơ sở dữ liệu, thiết lập hệ thống xác thực, quản lý file đến xây dựng API – mỗi thành phần đều cần được triển khai cẩn thận. Đây chính là lúc PocketBase xuất hiện như một giải pháp toàn diện, giúp developers tiết kiệm thời gian và công sức đáng kể.
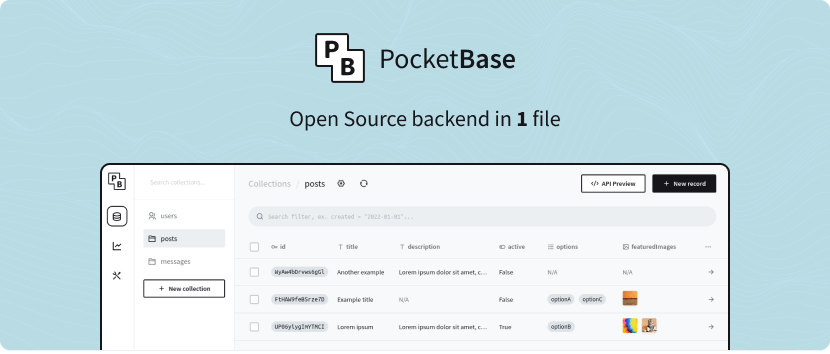
PocketBase là một framework backend mã nguồn mở được viết bằng Go, nổi bật với khả năng self-hosted và cực kỳ nhẹ – chỉ khoảng 12MB cho toàn bộ executable file. Điều đặc biệt là PocketBase tích hợp sẵn tất cả các tính năng cần thiết cho một backend hiện đại: cơ sở dữ liệu SQLite với hỗ trợ realtime, hệ thống xác thực người dùng đầy đủ, quản lý file thông minh, và API RESTful dễ sử dụng.
Tại sao nên chọn PocketBase?
- Nhẹ và nhanh chóng: Với dung lượng chỉ 12MB, PocketBase có thể chạy trên hầu hết mọi nền tảng từ máy chủ VPS giá rẻ $4/tháng đến Raspberry Pi. Hiệu suất của nó cũng rất ấn tượng – có thể xử lý 10,000+ kết nối realtime đồng thời trên một VPS cấu hình khiêm tốn.
- Đơn giản hóa quy trình phát triển: Thay vì phải cấu hình nhiều dịch vụ riêng biệt như Firebase hay Supabase, PocketBase cung cấp tất cả trong một file executable duy nhất. Điều này giúp giảm thiểu đáng kể độ phức tạp trong quá trình triển khai và bảo trì.
- Tự chủ hoàn toàn: Không giống như các BaaS (Backend as a Service) thương mại, PocketBase cho phép bạn self-host hoàn toàn, tránh vendor lock-in và kiểm soát 100% dữ liệu của mình. Bạn có thể chạy nó trên server riêng, không phải lo lắng về chi phí tăng theo quy mô như Firebase.
So sánh với các backend phổ biến:
- PocketBase vs Firebase: Trong khi Firebase yêu cầu phụ thuộc vào hạ tầng Google và có thể tốn kém khi mở rộng quy mô, PocketBase hoàn toàn miễn phí và self-hosted. Tuy nhiên, Firebase có hệ sinh thái phong phú hơn với nhiều tính năng nâng cao như Cloud Functions và Analytics tích hợp sẵn.
- PocketBase vs Supabase: Supabase sử dụng PostgreSQL – một cơ sở dữ liệu quan hệ mạnh mẽ hơn SQLite của PocketBase. Tuy nhiên, PocketBase lại đơn giản hơn nhiều để triển khai và phù hợp với các dự án nhỏ đến trung bình. Supabase tốt hơn cho các ứng dụng production quy mô lớn cần khả năng mở rộng cao.
- PocketBase vs Appwrite: Appwrite cung cấp nhiều tính năng module hóa và dashboard phong phú hơn, nhưng có learning curve cao hơn. PocketBase lại đơn giản, nhanh chóng và dễ triển khai hơn, phù hợp với các prototype và MVP.
Các tính năng chính của PocketBase
1. Cơ sở dữ liệu SQLite tích hợp
PocketBase sử dụng SQLite với chế độ WAL (Write-Ahead Logging) để đảm bảo hiệu suất cao. Mặc dù SQLite thường được xem là cơ sở dữ liệu “nhẹ”, nhưng với cấu hình phù hợp, nó có thể xử lý hàng trăm nghìn bản ghi một cách hiệu quả.
2. Realtime Subscriptions
Một trong những tính năng nổi bật nhất là khả năng đồng bộ dữ liệu realtime thông qua Server-Sent Events (SSE). Bạn chỉ cần vài dòng code JavaScript để thiết lập kết nối realtime, hoàn hảo cho các ứng dụng chat, dashboard trực tiếp, hay notification.
3. Hệ thống xác thực đầy đủ
PocketBase hỗ trợ nhiều phương thức xác thực:
- Email/Password authentication
- OAuth2 với hơn 15 providers (Google, Facebook, GitHub, Microsoft, Apple, v.v.)
- One-Time Password (OTP)
- Multi-Factor Authentication (MFA)
4. Quản lý file thông minh
Hệ thống quản lý file tích hợp cho phép upload, lưu trữ và serve file với hỗ trợ thumbnail tự động cho hình ảnh. Bạn có thể lưu trữ local hoặc sử dụng S3-compatible storage như AWS S3, MinIO, DigitalOcean Spaces.
5. Admin Dashboard trực quan
PocketBase đi kèm với giao diện quản trị web đầy đủ, cho phép bạn quản lý collections, records, users và cấu hình hệ thống mà không cần viết code.
6. API RESTful tự động
Mỗi collection bạn tạo sẽ tự động có sẵn các endpoint API đầy đủ cho CRUD operations. PocketBase còn cung cấp API documentation tự động cho từng collection[54].
7. Mở rộng với JavaScript hoặc Go
Bạn có thể mở rộng PocketBase bằng cách viết custom hooks và routes với JavaScript (pb_hooks) hoặc sử dụng nó như một Go framework.
Yêu cầu hệ thống
Một trong những điểm mạnh lớn nhất của PocketBase là yêu cầu hệ thống cực kỳ thấp, phù hợp với hầu hết mọi môi trường:
Cấu hình tối thiểu
- CPU: 0.1 vCPU (đủ cho các ứng dụng nhỏ)
- RAM: 0.3GB – 0.5GB
- Storage: 5GB cho application data
- Hệ điều hành: Windows, macOS, Linux (x64, ARM64)
- Chi phí ước tính: Từ $4-5/tháng cho VPS cơ bản
Cấu hình khuyến nghị
Để xử lý 10,000+ realtime connections đồng thời:
- CPU: 2 vCPU
- RAM: 4GB
- Storage: SSD/NVMe để tối ưu hiệu suất SQLite
Platform hỗ trợ
PocketBase hỗ trợ nhiều nền tảng build target:
- Linux (386, amd64, arm, arm64, loong64, ppc64le, riscv64, s390x)
- macOS (amd64, arm64)
- Windows (386, amd64, arm64)
- FreeBSD (amd64, arm64)
Yêu cầu phát triển
Nếu bạn muốn sử dụng PocketBase như một Go framework:
- Go version: 1.23+ (bắt buộc cho phiên bản mới nhất)
- Build với CGO: Tùy chọn nhưng có thể tăng hiệu suất gấp đôi cho một số query
Hướng dẫn cài đặt PocketBase chi tiết

Phương pháp 1: Sử dụng Prebuilt Executable (Khuyến nghị cho người mới)
Đây là cách đơn giản nhất để bắt đầu với PocketBase.
Bước 1: Download PocketBase
- Truy cập trang GitHub Releases: https://github.com/pocketbase/pocketbase/releases
- Tải phiên bản phù hợp với hệ điều hành của bạn:
- Linux x64:
pocketbase_0.31.0_linux_amd64.zip(~12MB) - Windows x64:
pocketbase_0.31.0_windows_amd64.zip(~12MB) - macOS x64:
pocketbase_0.31.0_darwin_amd64.zip(~12MB) - Linux ARM64:
pocketbase_0.31.0_linux_arm64.zip(~11MB)
Hoặc sử dụng wget trên Linux/macOS:
# Kiểm tra kiến trúc hệ thống
[[ "$(uname -m)" == "x86_64" ]] && echo "amd64" || echo "arm64"

# Tải phiên bản Linux amd64
wget https://github.com/pocketbase/pocketbase/releases/download/v0.31.0/pocketbase_0.31.0_linux_amd64.zip
Bước 2: Giải nén file
# Linux/macOS
unzip pocketbase_0.31.0_linux_amd64.zip -d pocketbase

# Di chuyển vào thư mục
cd pocketbase
Trên Windows, bạn có thể sử dụng công cụ giải nén tích hợp hoặc 7-Zip.
Bước 3: Chạy PocketBase
# Linux/macOS - Cấp quyền thực thi
chmod +x pocketbase

# Khởi động server
./pocketbase serve
Trên Windows:
pocketbase.exe serveKhi chạy lần đầu, PocketBase sẽ:
- Tự động mở trình duyệt với link installer
- Tạo 2 thư mục mới:
pb_data: Lưu trữ database, uploaded files, logspb_migrations: Chứa migration files (có thể commit vào Git)
Bước 4: Tạo tài khoản Admin đầu tiên
Có 2 cách để tạo admin account:
Cách 1: Sử dụng web installer (tự động mở trình duyệt):
- Truy cập
http://127.0.0.1:8090/ - Nhập email và password
- Click “Create and Login”
Cách 2: Sử dụng command line:
./pocketbase superuser create [email protected] MatKhau123Bước 5: Truy cập các Endpoints
Sau khi khởi động, PocketBase sẽ có các routes mặc định:
- Dashboard:
http://127.0.0.1:8090/– Admin UI - REST API:
http://127.0.0.1:8090/api/– API endpoints - Static Files:
http://127.0.0.1:8090– Serve files từ thư mụcpb_public(nếu tồn tại)
Phương pháp 2: Triển khai trên VPS (Linux Server)
Đây là cách triển khai production-ready trên server Linux.
Bước 1: Chuẩn bị server
# Kết nối SSH
ssh root@<your_server_ip>

# Update system
apt update && apt upgrade -y && apt install -y unzip

# Tạo user riêng cho PocketBase
adduser pocketbase

# Chuyển sang user pocketbase
su - pocketbase
Bước 2: Download và setup
# Tải PocketBase (kiểm tra phiên bản mới nhất trên GitHub)
wget https://github.com/pocketbase/pocketbase/releases/download/v0.31.0/pocketbase_0.31.0_linux_amd64.zip

# Giải nén
unzip pocketbase_0.31.0_linux_amd64.zip

# Cấp quyền thực thi
chmod +x pocketbase
Bước 3: Cấu hình Systemd Service
Thoát khỏi user pocketbase và tạo systemd service:
# Quay lại root user
exit

# Cho phép PocketBase bind port dưới 1024 (ví dụ: port 80, 443)
setcap CAP_NET_BIND_SERVICE=+eip /home/pocketbase/pocketbase

# Tạo systemd service file
cat <<EOF > /etc/systemd/system/pocketbase.service
[Unit]
Description=PocketBase
After=network-online.target

[Service]
User=pocketbase
WorkingDirectory=/home/pocketbase
ExecStart=/home/pocketbase/pocketbase serve --http=0.0.0.0:80
Restart=always
RestartSec=5

[Install]
WantedBy=multi-user.target
EOF

# Reload systemd
systemctl daemon-reload

# Enable service để tự động khởi động
systemctl enable pocketbase.service

# Khởi động service
systemctl start pocketbase.service

# Kiểm tra status
systemctl status pocketbase
Bước 4: Cấu hình SSL/HTTPS (Tùy chọn)
Cách 1: Sử dụng tính năng SSL tự động của PocketBase:
# Chỉnh sửa service file
systemctl stop pocketbase
nano /etc/systemd/system/pocketbase.service

# Thay đổi ExecStart thành:
# ExecStart=/home/pocketbase/pocketbase serve --http=yourdomain.com:80 --https=yourdomain.com:443

systemctl daemon-reload
systemctl start pocketbase
PocketBase sẽ tự động tạo SSL certificate qua Let’s Encrypt!
Cách 2: Sử dụng Nginx reverse proxy:
# Cài đặt Nginx
apt install nginx -y

# Tạo config file
cat <<'EOF' > /etc/nginx/sites-available/pocketbase
server {
    listen 80;
    server_name vnrom.net;

    location / {
        proxy_pass http://localhost:8090;
        proxy_http_version 1.1;
        proxy_set_header Upgrade $http_upgrade;
        proxy_set_header Connection 'upgrade';
        proxy_set_header Host $host;
        proxy_cache_bypass $http_upgrade;
    }
}
EOF

# Enable site
ln -s /etc/nginx/sites-available/pocketbase /etc/nginx/sites-enabled/
nginx -t
systemctl restart nginx

# Cài đặt SSL với Certbot
apt install certbot python3-certbot-nginx -y
certbot --nginx -d vnrom.net
Phương pháp 3: Triển khai với Docker
Docker giúp đơn giản hóa việc deployment và quản lý.
Bước 1: Tạo docker-compose.yml
version: "3.7"
services:
  pocketbase:
    image: ghcr.io/muchobien/pocketbase:latest
    container_name: pocketbase
    restart: unless-stopped
    command:
      - --encryptionEnv
      - ENCRYPTION
    environment:
      ENCRYPTION: YOUR_32_CHARACTER_ENCRYPTION_KEY_HERE
    ports:
      - "8090:8090"
    volumes:
      - ./pb_data:/pb_data
      - ./pb_public:/pb_public
      - ./pb_migrations:/pb_migrations
    healthcheck:
      test: wget --no-verbose --tries=1 --spider http://localhost:8090/api/health || exit 1
      interval: 5s
      timeout: 5s
      retries: 5
Bước 2: Khởi động container
# Tạo encryption key (quan trọng!)
openssl rand -hex 16

# Cập nhật ENCRYPTION trong docker-compose.yml với key vừa tạo

# Khởi động
docker compose up -d --build

# Xem logs
docker compose logs -f pocketbase
Bước 3: Truy cập
Mở trình duyệt và truy cập http://localhost:8090 để setup admin account.
Phương pháp 4: Sử dụng PocketBase như Go Framework
Phương pháp này phù hợp nếu bạn muốn custom logic phức tạp.
Bước 1: Cài đặt Go
Cài đặt Go 1.23+ từ https://go.dev/dl/
Bước 2: Tạo Project
mkdir myapp
cd myapp

# Tạo main.go file
cat <<'EOF' > main.go
package main

import (
    "log"

    "github.com/pocketbase/pocketbase"
    "github.com/pocketbase/pocketbase/core"
)

func main() {
    app := pocketbase.New()

    // Custom route example
    app.OnServe().BindFunc(func(se *core.ServeEvent) error {
        se.Router.GET("/hello/:name", func(re *core.RequestEvent) error {
            name := re.Request.PathValue("name")
            return re.String(200, "Hello "+name)
        })
        return se.Next()
    })

    if err := app.Start(); err != nil {
        log.Fatal(err)
    }
}
EOF

# Initialize Go modules
go mod init myapp
go mod tidy
Bước 3: Build và chạy
# Development mode
go run main.go serve

# Production build (static binary)
CGO_ENABLED=0 go build

# Chạy binary
./myapp serve
Xử lý lỗi phổ biến
Lỗi 1: Port đã được sử dụng
# Thay đổi port mặc định
./pocketbase serve --http=127.0.0.1:8091
Lỗi 2: Permission denied trên Linux[10]
# Cấp quyền thực thi
chmod +x pocketbase

# Nếu bind port < 1024 bị lỗi
sudo setcap CAP_NET_BIND_SERVICE=+eip ./pocketbase
Lỗi 3: Database locked
Thường xảy ra khi:
- Nhiều process cùng access pb_data
- Sử dụng mounted volume không tương thích (Docker on Mac)
- Antivirus lock file
Giải pháp:
- Tắt các process đang chạy
- Sử dụng local volume thay vì mounted
- Tăng file descriptors limit
Lỗi 4: pb_hooks không load
- Đảm bảo file có extension
.pb.js - Đặt trong thư mục
pb_hookscùng cấp với executable - Kiểm tra syntax errors bằng cách chạy
./pocketbase serve --dev
Hướng dẫn sử dụng PocketBase
Tạo collection (Bảng dữ liệu)
Collections trong PocketBase tương tự như tables trong SQL.
Cách 1: Sử dụng Admin Dashboard
- Truy cập Dashboard tại
http://127.0.0.1:8090 - Click “New Collection”
- Chọn loại collection:
- Base: Collection thông thường cho dữ liệu ứng dụng
- Auth: Collection cho user authentication
- View: Read-only collection từ SQL query
- Đặt tên collection (ví dụ: “posts”)
- Thêm các fields:
- Text: Văn bản thông thường
- Number: Số (integer, float)
- Bool: True/False
- Email: Email với validation
- URL: URL với validation
- Date: Ngày giờ
- Select: Dropdown options
- File: Upload file
- Relation: Liên kết đến collection khác
- JSON: Dữ liệu JSON tùy ý
- Click “Create” để hoàn tất
Cách 2: Sử dụng Migrations (Code-based)
Tạo file trong thư mục pb_migrations/:
// pb_migrations/1234567890_created_posts.js
migrate((app) => {
  const collection = new Collection({
    name: "posts",
    type: "base",
    schema: [
      {
        name: "title",
        type: "text",
        required: true,
      },
      {
        name: "content",
        type: "text",
      },
      {
        name: "author",
        type: "relation",
        options: {
          collectionId: "_pb_users_auth_", // Users collection
        }
      }
    ]
  });

  return app.save(collection);
}, (app) => {
  // Revert migration
  const collection = app.findCollectionByNameOrId("posts");
  return app.delete(collection);
});
Quản lý Records (CRUD Operations)
Tạo record mới
Sử dụng JavaScript SDK:
import PocketBase from 'pocketbase';

const pb = new PocketBase('http://127.0.0.1:8090');

// Tạo record đơn giản
const record = await pb.collection('posts').create({
    title: 'Bài viết đầu tiên',
    content: 'Nội dung bài viết...',
});

console.log(record.id); // ID của record mới tạo
Upload file cùng record:
// Từ HTML file input
const fileInput = document.getElementById('fileInput');
const formData = new FormData();

formData.append('title', 'Bài viết có hình');
formData.append('content', 'Nội dung...');

// Upload nhiều files
for (let file of fileInput.files) {
    formData.append('images', file);
}

const record = await pb.collection('posts').create(formData);
Đọc Records
Lấy danh sách records:
// Lấy 20 records đầu tiên
const resultList = await pb.collection('posts').getList(1, 20, {
    filter: 'title != ""',  // Filtering
    sort: '-created',        // Sắp xếp theo ngày tạo (mới nhất)
    expand: 'author',        // Expand relations
});

console.log(resultList.items);
console.log(resultList.totalItems);
Lấy một record cụ thể:
const record = await pb.collection('posts').getOne('RECORD_ID', {
    expand: 'author,comments',
});

console.log(record.title);
console.log(record.expand.author.email);
Cập nhật record
const record = await pb.collection('posts').update('RECORD_ID', {
    title: 'Tiêu đề mới',
    content: 'Nội dung đã cập nhật',
});
Xóa record
await pb.collection('posts').delete('RECORD_ID');Xây dựng hệ thống xác thực
Tạo Auth Collection
- Trong Dashboard, click “New Collection”
- Chọn Auth Collection
- Đặt tên “users”
- Cấu hình Options:
- Enable “Email/Password” authentication
- Enable “OAuth2” providers nếu cần
- Enable “OTP” cho authentication qua email code
- Enable “MFA” cho bảo mật tăng cường
Đăng ký user mới
const userData = {
    email: '[email protected]',
    password: 'MatKhau123',
    passwordConfirm: 'MatKhau123',
    name: 'Nguyễn Văn Duy',
};

const record = await pb.collection('users').create(userData);

// Gửi email verification (nếu đã enable)
await pb.collection('users').requestVerification('[email protected]');
Đăng nhập
Email/Password authentication:
const authData = await pb.collection('users').authWithPassword(
    '[email protected]',
    'MatKhau123'
);

// Truy cập auth data
console.log(pb.authStore.isValid);   // true
console.log(pb.authStore.token);     // JWT token
console.log(pb.authStore.record.id); // User ID
console.log(pb.authStore.record.email);
OAuth2 authentication (Google, Facebook, etc.):
// Mở popup OAuth2
const authData = await pb.collection('users').authWithOAuth2({
    provider: 'google'
});

// authData chứa token và user record
console.log(authData.record.email);
OTP authentication:
// Bước 1: Request OTP
const result = await pb.collection('users').requestOTP('[email protected]');

// Bước 2: User nhập code từ email
const otpCode = '123456'; // Code từ email

// Bước 3: Xác thực với OTP
const authData = await pb.collection('users').authWithOTP(
    result.otpId,
    otpCode
);
Multi-Factor Authentication (MFA)
try {
    // Bước 1: Đăng nhập bình thường
    await pb.collection('users').authWithPassword('[email protected]', 'MatKhau123');
} catch (err) {
    // Nếu MFA được enable, sẽ nhận được mfaId
    const mfaId = err.response?.mfaId;

    if (mfaId) {
        // Bước 2: Yêu cầu OTP cho bước xác thực thứ 2
        const result = await pb.collection('users').requestOTP('[email protected]');

        // Bước 3: Xác thực với OTP + mfaId
        const authData = await pb.collection('users').authWithOTP(
            result.otpId,
            'OTP_CODE',
            { mfaId: mfaId }
        );
    }
}
Quản lý Auth State
// Đăng xuất
pb.authStore.clear();

// Kiểm tra đăng nhập
if (pb.authStore.isValid) {
    console.log('User đang đăng nhập:', pb.authStore.record.email);
}

// Refresh token tự động
pb.authStore.onChange((token, record) => {
    console.log('Auth state changed:', token, record);
});

// Manual refresh token
await pb.collection('users').authRefresh();
Tích hợp Realtime Subscriptions
PocketBase hỗ trợ realtime updates qua Server-Sent Events.
Subscribe đến Collection
// Subscribe đến tất cả records trong collection
await pb.collection('posts').subscribe('*', (e) => {
    console.log('Realtime event:', e.action); // create, update, delete
    console.log('Record:', e.record);
});

// Subscribe đến một record cụ thể
await pb.collection('posts').subscribe('RECORD_ID', (e) => {
    console.log('Record updated:', e.record);
});
Subscribe với filter
// Chỉ nhận updates cho records thỏa điều kiện
await pb.collection('posts').subscribe('*', (e) => {
    console.log('Post event:', e.record);
}, {
    filter: 'status = "published"',
    expand: 'author',
});
Unsubscribe
// Unsubscribe từ collection
await pb.collection('posts').unsubscribe('*');

// Unsubscribe tất cả
await pb.realtime.unsubscribe();
Ví dụ thực tế: Chat Realtime
// Component: Chat.js
import { useEffect, useState } from 'react';
import PocketBase from 'pocketbase';

const pb = new PocketBase('http://127.0.0.1:8090');

function Chat() {
    const [messages, setMessages] = useState([]);

    useEffect(() => {
        // Fetch initial messages
        pb.collection('messages').getList(1, 50, {
            sort: 'created',
        }).then(result => {
            setMessages(result.items);
        });

        // Subscribe to new messages
        pb.collection('messages').subscribe('*', (e) => {
            if (e.action === 'create') {
                setMessages(prev => [...prev, e.record]);
            }
        });

        // Cleanup
        return () => {
            pb.collection('messages').unsubscribe('*');
        };
    }, []);

    const sendMessage = async (text) => {
        await pb.collection('messages').create({
            text: text,
            user: pb.authStore.record.id,
        });
    };

    return (
        <div>
            {messages.map(msg => (
                <div key={msg.id}>{msg.text}</div>
            ))}
        </div>
    );
}
API Rules – Bảo vệ dữ liệu
PocketBase cho phép thiết lập quyền truy cập chi tiết cho từng collection.
Các loại rules
Mỗi collection có 5 rules tương ứng với các API action:
- listRule: Quyền xem danh sách records
- viewRule: Quyền xem chi tiết một record
- createRule: Quyền tạo record mới
- updateRule: Quyền cập nhật record
- deleteRule: Quyền xóa record
Ví dụ API Rules
Public read, authenticated write:
// listRule & viewRule
@request.auth.id != ""  // Chỉ user đã đăng nhập

// createRule
@request.auth.id != ""

// updateRule & deleteRule
@request.auth.id = author.id  // Chỉ tác giả
Private (chỉ owner có quyền):
// Tất cả rules
@request.auth.id = owner.id
Public read, admin write:
// listRule & viewRule
""  // Không điều kiện = public

// createRule, updateRule, deleteRule
@request.auth.role = "admin"
Tích hợp JavaScript SDK trong ứng dụng
Setup cơ bản
React/Next.js:
// lib/pocketbase.js
import PocketBase from 'pocketbase';

const pb = new PocketBase(process.env.NEXT_PUBLIC_POCKETBASE_URL || 'http://127.0.0.1:8090');

export default pb;
SvelteKit:
// hooks.server.js
import PocketBase from 'pocketbase';
import { env } from '$env/dynamic/private';

export const handle = async ({ event, resolve }) => {
    event.locals.pb = new PocketBase(env.PB_URL);

    // Load auth từ cookie
    event.locals.pb.authStore.loadFromCookie(event.request.headers.get('cookie') || '');

    try {
        if (event.locals.pb.authStore.isValid) {
            await event.locals.pb.collection('users').authRefresh();
        }
    } catch (_) {
        event.locals.pb.authStore.clear();
    }

    const response = await resolve(event);

    // Save auth to cookie
    response.headers.append('set-cookie', event.locals.pb.authStore.exportToCookie());

    return response;
};
Vue.js:
// plugins/pocketbase.js
import PocketBase from 'pocketbase';

export default defineNuxtPlugin(() => {
    const pb = new PocketBase('http://127.0.0.1:8090');

    return {
        provide: {
            pb
        }
    };
});
TypeScript Support
// Định nghĩa types cho collections
interface Post {
    id: string;
    title: string;
    content: string;
    author: string;
    created: string;
    updated: string;
}

interface User {
    id: string;
    email: string;
    name: string;
    avatar?: string;
}

// Type-safe collections
interface TypedPocketBase extends PocketBase {
    collection(name: 'posts'): RecordService<Post>;
    collection(name: 'users'): RecordService<User>;
    collection(name: string): RecordService; // Fallback
}

const pb = new PocketBase('http://127.0.0.1:8090') as TypedPocketBase;

// Autocomplete và type checking
const posts = await pb.collection('posts').getList<Post>(1, 20);
posts.items.forEach(post => {
    console.log(post.title); // Type-safe
});
Triển khai production
Khuyến nghị bảo mật
- Sử dụng SMTP mail server thay vì default sendmail
- Enable MFA cho superusers
- Sử dụng HTTPS cho production
- Backup định kỳ thư mục
pb_data - Tăng file descriptors limit nếu cần xử lý nhiều connections
# Tăng file descriptors (Linux)
ulimit -n 65536

# Hoặc cấu hình vĩnh viễn trong /etc/security/limits.conf
echo "* soft nofile 65536" >> /etc/security/limits.conf
echo "* hard nofile 65536" >> /etc/security/limits.conf
Backup và restore
Backup:
# Stop PocketBase
systemctl stop pocketbase

# Backup pb_data
tar -czf pb_data_backup_$(date +%Y%m%d).tar.gz pb_data/

# Restart
systemctl start pocketbaseRestore:
systemctl stop pocketbase
tar -xzf pb_data_backup_20250101.tar.gz
systemctl start pocketbase
Monitoring và logging
Xem logs từ systemd:
# Realtime logs
journalctl -u pocketbase -f

# Logs từ thời điểm cụ thể
journalctl -u pocketbase --since "2025-01-01"
Enable debug mode:
./pocketbase serve --devHosting Services
Một số platform phù hợp để host PocketBase:
- Railway: One-click deploy, từ $5/tháng
- Fly.io: Edge hosting, free tier available
- Hetzner: VPS giá rẻ từ €4/tháng
- DigitalOcean: Droplets từ $4/tháng
- Coolify: Self-hosted PaaS với auto-deploy từ Git
- PocketHost: Managed PocketBase hosting (chuyên dụng)
Use cases thực tế
PocketBase phù hợp cho nhiều loại ứng dụng:
1. MVPs và prototypes
- Startup validation
- Hackathon projects
- Proof of concepts
- Side projects
2. Ứng dụng SMB
- Internal tools
- CRM systems
- Inventory management
- School management systems
3. SaaS nhỏ/trung
- Blog platforms
- Portfolio sites
- E-learning platforms
- Job boards
4. Real-time Applications
- Chat apps
- Live dashboards
- Collaborative tools
- Notification systems
5. Mobile App Backends
- iOS/Android apps với Dart SDK
- React Native apps
- Flutter apps
Ưu điểm và hạn chế
Ưu điểm
- Cực kỳ nhẹ: 12MB cho toàn bộ backend
- Dễ triển khai: Single executable, không cần dependencies
- Chi phí thấp: Self-hosted hoàn toàn miễn phí
- No cold starts: Luôn chạy, response nhanh
- Tự chủ dữ liệu: Không vendor lock-in
- Realtime built-in: WebSocket subscriptions
- Full-stack: Database + Auth + Storage + API
- Mở rộng dễ dàng: Với Go hoặc JavaScript hooks
Hạn chế
- Không phù hợp cho enterprise scale: SQLite có giới hạn về concurrency
- Chưa v1.0: Breaking changes có thể xảy ra
- Ecosystem nhỏ hơn: Ít integrations so với Firebase/Supabase
- Self-hosted only: Không có managed option (trừ PocketHost)
- SQLite limitations: Không tốt cho write-heavy workloads cực lớn
- Single server scaling: Chỉ scale vertically, không horizontal
PocketBase là một giải pháp backend mã nguồn mở xuất sắc cho developers muốn xây dựng ứng dụng nhanh chóng mà không cần phức tạp hóa infrastructure. Với khả năng tự chứa, nhẹ (chỉ 12MB), và tích hợp đầy đủ các tính năng từ database realtime, authentication, file storage đến API RESTful, PocketBase giúp tiết kiệm hàng tuần thời gian phát triển.
Đặc biệt phù hợp cho các dự án nhỏ đến trung bình, MVPs, side projects, và ứng dụng cần tự chủ hoàn toàn về dữ liệu. Chi phí vận hành cực thấp – chỉ cần VPS $4/tháng có thể xử lý hàng nghìn users đồng thời.
Tuy nhiên, nếu bạn đang xây dựng ứng dụng enterprise-scale với hàng triệu users, cần horizontal scaling, hoặc muốn managed infrastructure, các giải pháp như Supabase hay Firebase có thể phù hợp hơn.